Exercise 1Creating a "Hello World" Lightning Component

Objectives

In this exercise, you will learn how to:

  • Build a simple Lightning Component
  • Declare attributes and use data binding

Step 1 - Hello World

  1. Click on the Properties tab in the Dreamhouse Lightning App and navigate to a Property Record Detail page (it doesn’t matter which one).
  2. Click on the Setup icon Setup in the upper righthand corner and choose Developer Console.
  3. In the Developer Console, choose File > New > Lightning Component.
  4. Enter HelloWorld as the component name.
  5. Check the Lightning Record Page checkbox, then click Submit.
  6. Type Hello World inside the <aura:component> ... </aura:component> tags.
  7. Save the file.

Step 2 - Add the component to a page

  1. Navigate to a Property Record Detail page.
  2. Select Edit Page in the Setup menu.
  3. Locate the HelloWorld component under Custom Components.
  4. Drag it onto the page and place it at the top of the right-hand column.
  5. Click the Save button.

    Since this is the first time we’ve modified the standard Property page, we need to activate the updated page so that our users can see what we’ve done.

  6. Click Activate.
  7. Click App Default and then Assign as App Default.
  8. Select the Dreamhouse Lightning app, then click Next and then Save.
  9. Click Back to return to the Property page.

Step 3 - Styling with SLDS

  1. Wrap Hello World in a <div>.
  2. Open the Salesforce Lightning Design System site.
  3. Click on the Components link and navigate to Cards in the lefthand column.
  4. Locate the class="slds-card" assigned to the <article> tag in the code sample.
  5. In the Developer Console, add class="slds-card" to the <div> tag.
  6. Save the file and reload the Property Detail page.

    Screenshot: HelloWorld component

  7. Switch back to the SLDS site, and locate the class="slds-card__body slds-card__body_inner" applied to the last <div>.
  8. In the Developer Console, wrap Hello World with <div class="slds-card__body slds-card__body_inner">.
  9. Switch back to the SLDS site and open the Utilities section in the lefthand navigation.
  10. Click on Padding.
  11. In the Developer Console, add slds-p-top_medium to the second <div> so that it looks like this <div class="slds-card__body slds-card__body_inner slds-p-top_medium">.
  12. Save the file and refresh the Property Detail page.
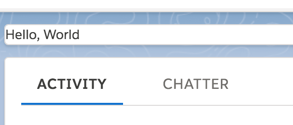
    Screenshot: HelloWorld component with padding

Step 4 - Using data binding

  1. In the Developer Console, replace the Hello World text with Hello, {!v.greeting}!.
  2. Add a new line on line 2, and add:

     <aura:attribute name="greeting" type="String" default="World" />
    
  3. Save the component and reload the Property Detail page.

Step 5 - Adding form elements

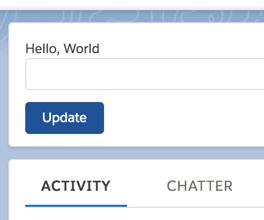
  1. Add the following input field on a new line below the Hello {!v.greeting}:

     <input aura:id="myInput" type="text" />
     <button name="Update" type="submit">Update</button>
    
  2. Save the file and reload the Property Detail page.
  3. Switch to the SLDS site and find Input in the Components section.
  4. Notice the slds-input class applied to the <input> tag.
  5. Add class="slds-input" to the <input> tag in the Developer Console.
  6. Switch back to the SLDS site and find Buttons in the list of Components.
  7. Click the slds-button_brand radio button in the Theme section in the righthand column.
  8. Copy class="slds-button slds-button_brand" from the code sample and add it to the <button> in the Developer Console.
  9. Switch back to the SLDS site and find Margin in the Utilities section.
  10. Add slds-m-top_small to the button’s list of classes.
  11. Save the file and reload the Property Detail page.

    Screenshot: HelloWorld component with input and button

Step 6 - Using a JavaScript controller

  1. Add 
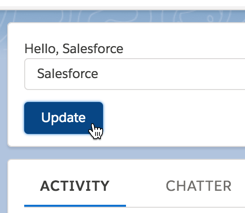
onclick="{!c.updateValue}" to the <button> in the Developer Console.
  2. Save the file.
  3. Click the Controller button on the righthand side of the Developer Console.
  4. Rename the function updateValue from myAction.
  5. Add the following to the updateValue function:

     var val = component.find("myInput").getElement().value;
     component.set("v.greeting", val);
    
  6. Save the file and reload the Property Detail page.
  7. Type your name into the input and click the Update button.

    Screenshot: HelloWorld component with updated string

Step 7 - Understanding two way data binding

  1. Remove class="slds-input" from the <input>.
  2. Add lightning: to the word <input> and add value="{!v.greeting}" so that it is now:

     <lightning:input aura:id="myInput" type="text" value="{!v.greeting}" />
    
  3. Remove the <button> from the component.
  4. Save the file and reload the Property Detail page.
  5. Type your name into the input and watch the magic happen!

Not working for you? Your finished HelloWorld component should be as follows:

HelloWorld.cmp
<aura:component implements="flexipage:availableForRecordHome,force:hasRecordId" access="global" >
	<aura:attribute name="greeting" type="String" default="World" />
	<div class="slds-card">
		<div class="slds-card__body slds-card__body_inner slds-p-top_medium">
			Hello, {!v.greeting}
			<lightning:input aura:id="myInput" type="text" value="{!v.greeting}" />
		</div>
	</div>
</aura:component>
HelloWorldController.js
({
	updateValue : function(component, event, helper) {
		var val = component.find("myInput").getElement().value;
		component.set("v.greeting", val);
	}
})