After completing the workshop, you will come away with hands-on experience building Lightning Components for Lightning Experience. The exercises will walk you through initial setup, show you how to customize Lightning pages, introduce you to the concepts of Lightning Components such as data bindings, JavaScript controllers, Base Lightning Components, events and much more.
Pre-Work: Complete Before the Workshop
Prior to the start of the workshop, you’ll need to complete the following steps:
- Log into Trailhead using the Login link in the upper righthand corner.
- Navigate to this project and scroll to the bottom of the page.
-
Click on the dropdown and choose Create a Trailhead Playground. This can take a few minutes.
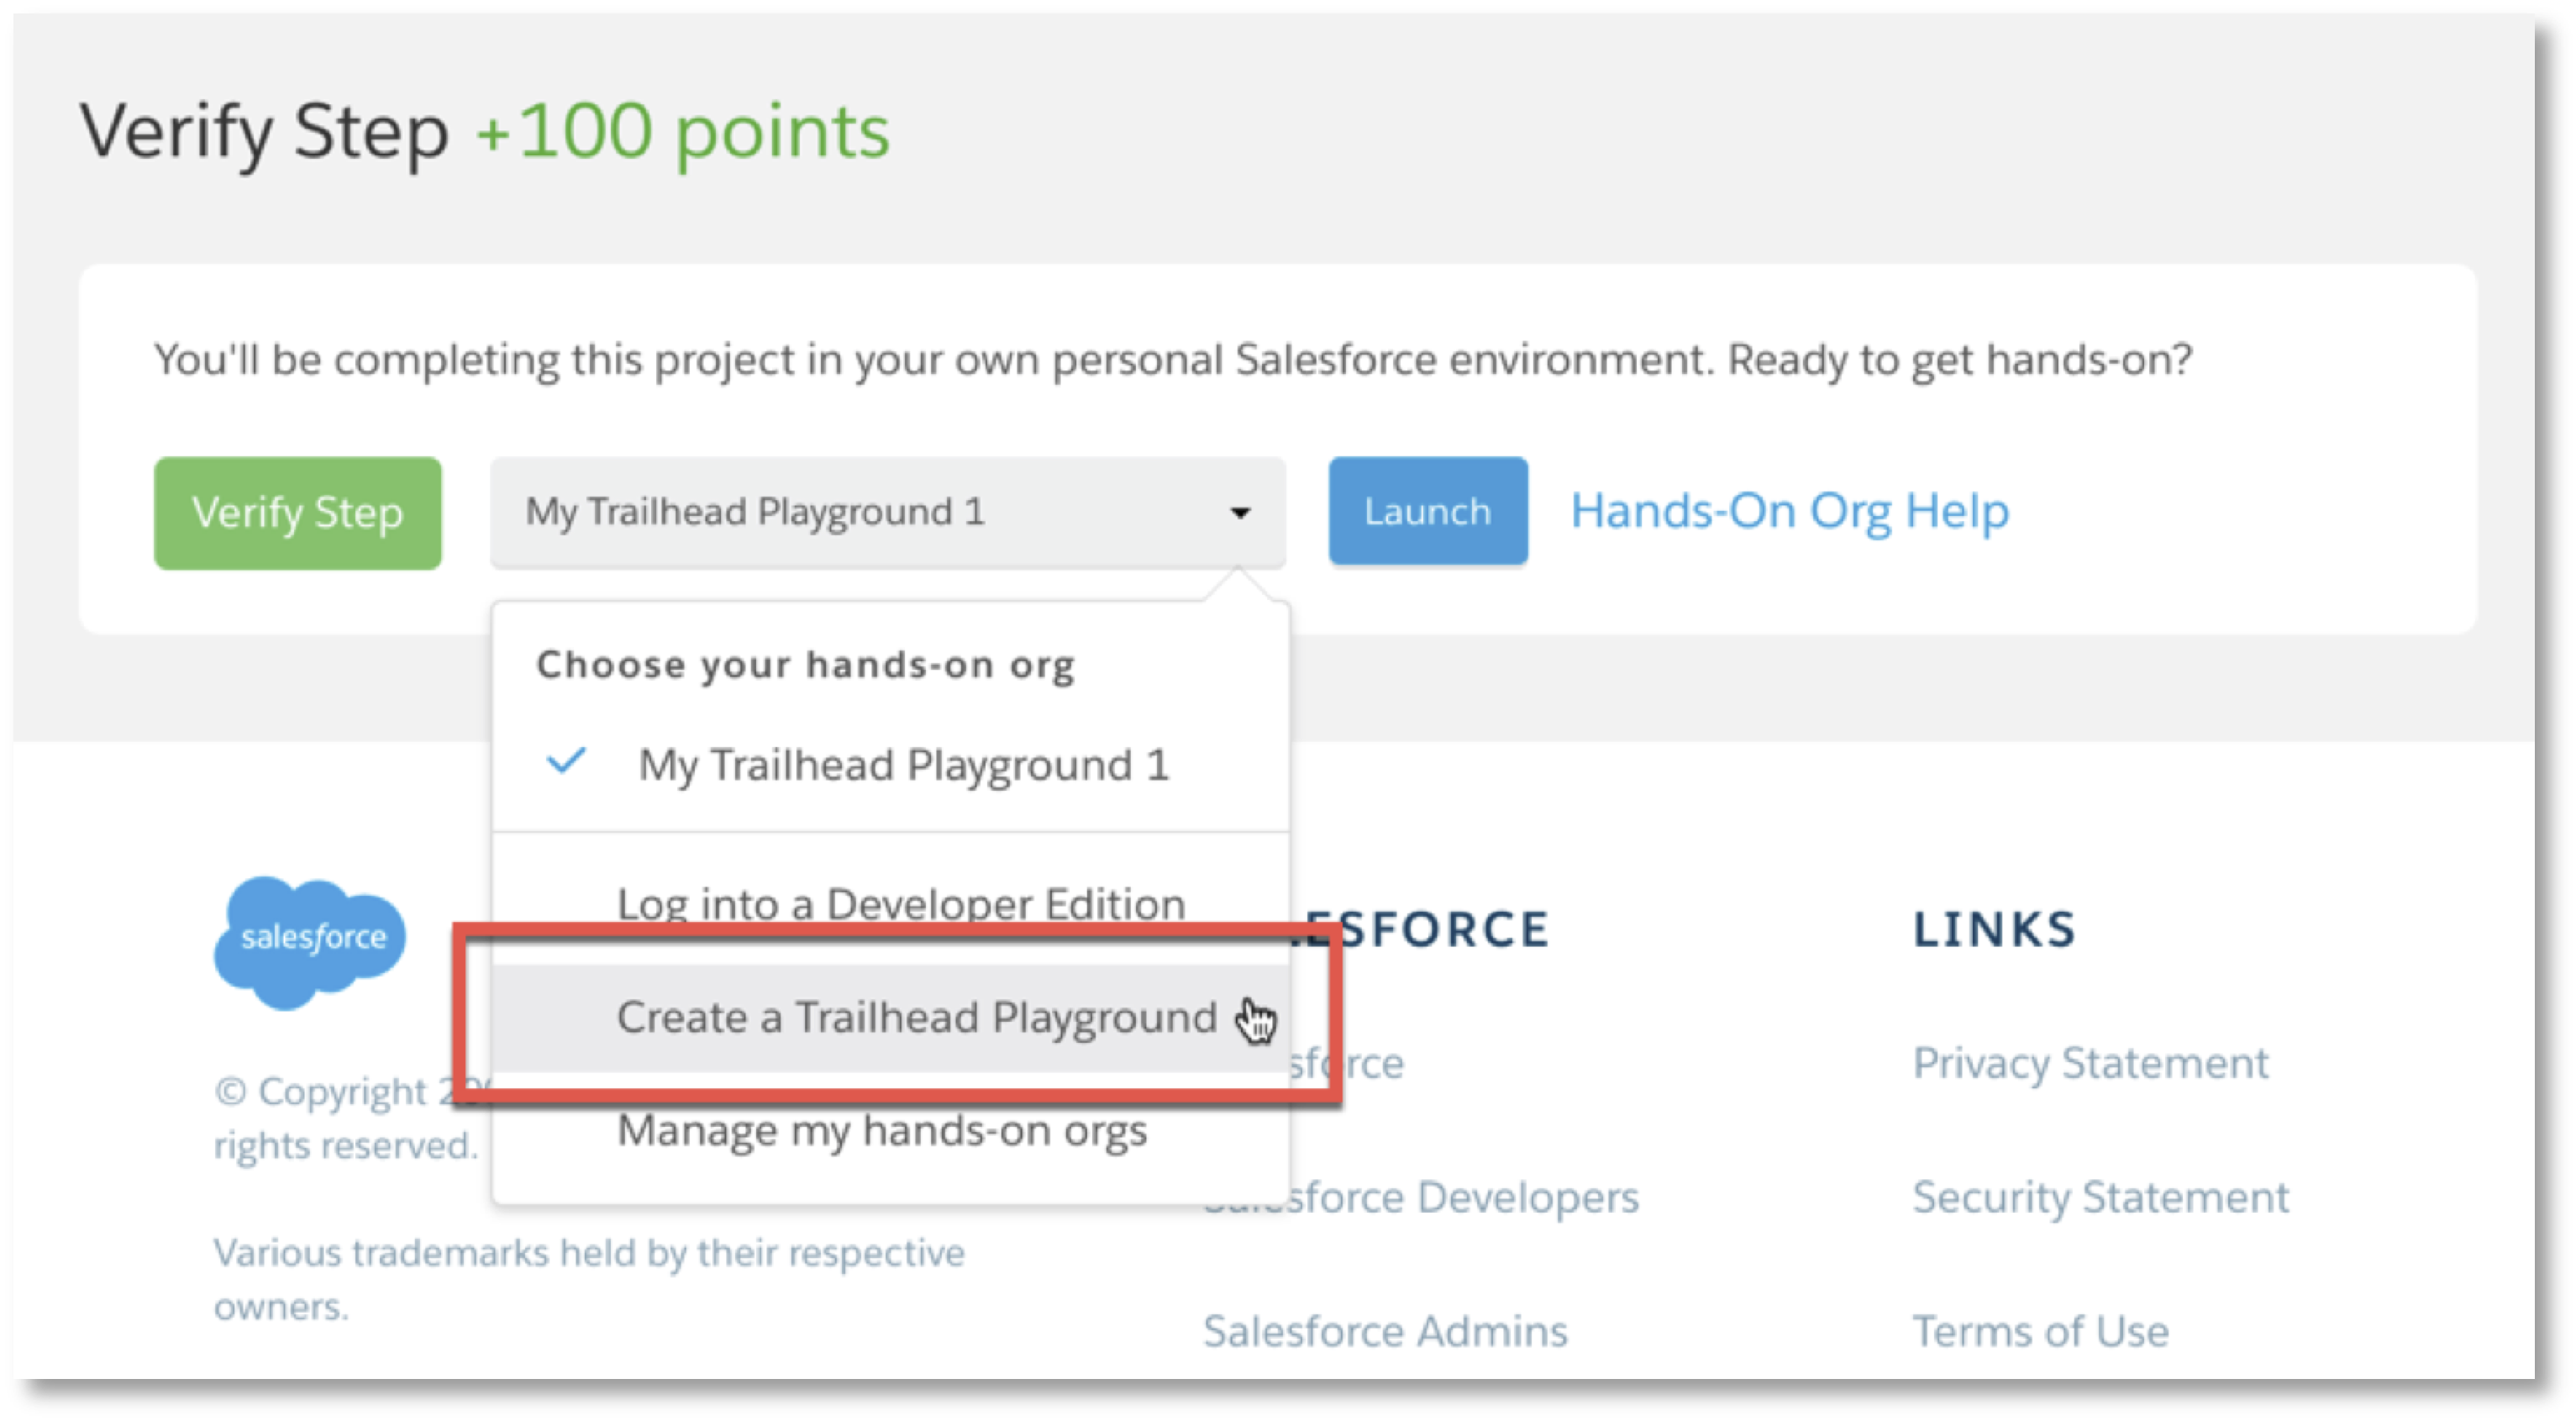
- Once your playground has been created, click the Launch button to open the new org.
- In your playground’s URL, replace everything following lightning.force.com with this:
/packaging/installPackage.apexp?p0=04t6A000000SG0F. Your URL should look similar to this: https://playful-raccoon-21646-dev-ed.lightning.force.com/packaging/installPackage.apexp?p0=04t6A000000SG0F. Press Return.
- Select Install for All Users and click Install.
- Once the installation is complete, click Done and then click the App Launcher
 in the upper-left corner.
- Select the Dreamhouse Lightning application.
- Click the Data Import tab and then click Initialize Sample Data. Depending on your screen size, the Data Import tab can be under More in the tab menu.
- To confirm that you are setup and ready to go, click the Properties tab. You should see a list of Properties.
Not seeing any properties? Go back to the Data Import tab and click the Initialize Sample Data button again.
Let's Get Started!
Additional Resources
- Lightning Experience Roadmap: Feature specific roadmap including Classic features coming to Lightning Experience and new features exclusive to Lightning Experience
- Trailhead - Migrate to Lightning Experience Trail
- Lightning Now Trailblazer Community Group: Ask questions of Salesforce Product Managers and experts, collaborate and share best practices with other Lightning Admins and Developers, and hear about upcoming Lightning events.
- Lightning Webinars, Blogs, and Podcasts: Hear from Product Managers, Expert Admins and Developers, Consultants, and Technical Experts on topics ranging from how to deep dive into your Lightning Experience Readiness Report to how Salesforce rolled out Lightning Experience to our employees.
- Register for a Lightning Experience Readiness Consultation: These are small-group interactive discussions, facilitated by a Salesforce Lightning Expert, where you can assess your organization’s readiness for Lightning Experience, ask questions, and develop a plan to enable Lightning Experience.