Exercise 1Creating a "Hello World" Lightning Web Component

Objectives

In this exercise, you will learn how to:

  • Build a simple Lightning Web Component
  • Declare attributes and use data binding

Step 1 - Component Creation

  1. Click on the Properties tab in the Dreamhouse Lightning App and navigate to a Property Record Detail page (it doesn’t matter which one).
  2. Switch to VS Code and open the folder with your project, if it is not already open.
  3. Use View > Command Palette or Cmd/Ctrl + Shift + P to open the Command Palette.
  4. From the Command Palette, select SFDX: Create Lightning Web Component.
  5. Give the component the name of helloWorld and press Enter/Return.
  6. Confirm that the default directory is force-app/main/default/lwc and press Enter/Return.
  7. In the File Explorer, toggle open the newly created lwc/helloWorld folders.
  8. Open helloWorld.html and add Hello, World on line 2.
  9. Save the file.

Step 2 - Add the component to a page

  1. Open helloWorld.js-meta.xml.
  2. Change the <isExposed> value to true.
  3. Add the following to a new line on line 5:

     <targets>
         <target>lightning__AppPage</target>
         <target>lightning__RecordPage</target>
         <target>lightning__HomePage</target>
     </targets>	
    
  4. Save the file.
  5. Open the Command Palette and choose SFDX: Push Source to Default Scratch Org.
  6. After successfully pushing to your scratch org, switch back to your Property Record page.
  7. Click the Setup icon Setup icon and then select Edit Page from the menu.
  8. Locate the helloWorld component under Custom Components.
  9. Drag it onto the page and place it at the top of the right-hand column.
  10. Click the Save button in App Builder.

    Since this is the first time we’ve modified the standard Property page, we need to activate the updated page so that our users can see what we’ve done.

  11. Click Activate.
  12. Click App Default and then Assign as App Default.
  13. Select the Dreamhouse Lightning app, then click Next, Next, and then Save.
  14. Click Back to return to the Property page.

Step 3 - Styling with SLDS

NOTE: Styling using the CSS from the Salesforce Lightning Design System (SLDS) will change in the future. Currently, styles are inherited from SLDS via the CSS served by the Lightning Experience. In the future, the Shadow DOM will no longer allow this. Guidance will be provided at a future date on how to consume the CSS from SLDS.

  1. Open the Salesforce Lightning Design System site.
  2. Click on the Component Blueprints link and navigate to Cards in the lefthand column.
  3. Looking at the Base Card Structure code sample, note the class="slds-card" assigned to the <article> tag.
  4. Back in VS Code in the helloWorld component, wrap the text Hello, World in a <div> tag.
  5. Add the attribute class="slds-card" to the <div> tag.
  6. Save the file.
  7. Open the Command Palette and choose SFDX: Push Source to Default Scratch Org.
  8. Reload the Property Detail page.

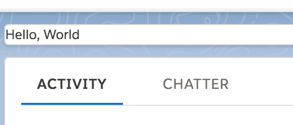
    Screenshot: HelloWorld component

  9. Switch back to the Base Card Structure code sample on the SLDS site.
  10. Locate the class="slds-card__body slds-card__body_inner" applied to the last <div>.
  11. Inside the existing <div>, wrap the text Hello World with <div class="slds-card__body slds-card__body_inner">.
  12. Switch back to the SLDS site and open the Utilities section in the lefthand navigation.
  13. Click on Padding.
  14. Click on Location - Vertical from the Right Hand Menu. Note the dimensions of the different padding classes.
  15. Add slds-p-vertical_small to the second <div> so that it looks like this: <div class="slds-card__body slds-card__body_inner slds-p-vertical_small">.
  16. Save the file.
  17. Open the Command Palette and choose SFDX: Push Source to Default Scratch Org.
  18. Refresh the Property Detail page.

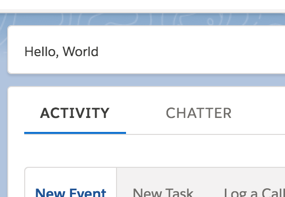
    Screenshot: HelloWorld component with padding

Step 4 - Using data binding

  1. In VS Code, replace “Hello, World” text with Hello, {greeting}!.
  2. Save the file.
  3. Open helloWorld.js.
  4. Make a new line between the {} of your HelloWorld class.
  5. Add the following:

     greeting = 'World';
    
  6. Save the file.
  7. Open the Command Palette and choose SFDX: Push Source to Default Scratch Org.
  8. Reload the Property Detail page.

    Note that nothing has visually changed, but the value of greeting is being displayed.

Step 5 - Adding form elements

  1. In helloWorld.html, add the following input field on a new line below the Hello {greeting}:

     <input type="text" value={greeting} />
    
  2. Save the file.
  3. Open the Command Palette and choose SFDX: Push Source to Default Scratch Org.
  4. Reload the Property Detail page.
  5. Switch to the SLDS site and find Input in the Components section.
  6. Notice the slds-input class applied to the <input> tag.
  7. Add class="slds-input" to the <input> tag in helloWorld.html.
  8. Save the file, and push it to your scratch org.
  9. Type your own name into the input, and notice that the “Hello, World” doesn’t update.

Step 6 - Using a JavaScript event to change a reactive property

  1. Add onchange={handleChange} to the <input>.
  2. In helloWorld.js, add the following on a new line after line 4:

     handleChange(event) {
         this.greeting = event.target.value;
     }	
    
  3. Save the file, and push it to your scratch org.
  4. Reload the Property Detail page.
  5. Type your name into the input again, then hit the Tab key, and notice the UI changes.

Step 7 - Building expressions

  1. In helloWorld.html, add the following on a new line after the <input>:

     <button name="Update" type="submit" class="slds-button slds-button_brand slds-m-top_small" onclick={handleClick}>Update</button>
    
  2. Change the value of the input to {myInput}.
  3. Save the file.
  4. In helloWorld.js, add the following property:

     myInput = 'World';
    
  5. Add the following to the handleChange method:

     this.myInput = this.greeting;
    
  6. Add a handleClick method:

     handleClick () {
         this.greeting = this.myInput + ". It's a pleasure to meet you";
     }
    
  7. Save the file, and push it to your scratch org.
  8. Reload the Property Detail page.
  9. Type your name into the input again, then click the button.

Not working for you? Your finished HelloWorld component should be as follows:

helloWorld.html
<template>
    <div class="slds-card">
        <div class="slds-card__body slds-card__body_inner slds-p-vertical_small">
            Hello, {greeting}!
            <input type="text" value={myInput} onchange={handleChange} class="slds-input" />
            <button name="Update" type="submit" class="slds-button slds-button_brand slds-m-top_small" onclick={handleClick}>Update</button>
        </div>
    </div>
</template>
helloWorld.js
import { LightningElement } from 'lwc';

export default class HelloWorld extends LightningElement {
    greeting = 'World';
    myInput = 'World';

    handleChange(event){
        this.greeting = event.target.value;
        this.myInput = this.greeting;
    }

    handleClick () {
		this.greeting = this.myInput + ". It's a pleasure to meet you";
	}
}
helloWorld.js-meta.xml
<?xml version="1.0" encoding="UTF-8"?>
<LightningComponentBundle xmlns="http://soap.sforce.com/2006/04/metadata">
    <apiVersion>48.0</apiVersion>
    <isExposed>true</isExposed>
    <targets>
        <target>lightning__AppPage</target>
        <target>lightning__RecordPage</target>
        <target>lightning__HomePage</target>
    </targets>
</LightningComponentBundle>