In this module, you create a SearchBar component that allows the user to search contacts by name. You could add the search bar to the ContactList component, but that would limit the reusability of the component: depending on specific UI requirements, you may want the search bar to be directly on top of the list (like you'll do here), integrated in the header, or somewhere else. You also want the ContactList component to be able to display a list of contacts independently of the type of search bar you use: regular input field with search button, type ahead search, etc. For these reasons, it's a good idea to decouple the search UI, from the display UI, and create two components: ContactList and SearchBar.
Now that we decided to build SearchBar and ContactList as two separate components, we need a way for ContactList to know when the search key changes so that it can retrieve and display the matching contacts. Lightning Events enable that kind of communication between components. In this step, you create a Lightning Event used by the SearchBar component to notify other components when the search key changes.
In the Developer Console, click File > New > Lightning Event. Specify SearchKeyChange as the bundle name and click Submit
Implement the event as follows:
<aura:event type="APPLICATION">
    <aura:attribute name="searchKey" type="String"/>
</aura:event>
Click File > Save to save the file
In the Developer Console, click File > New > Lightning Component. Specify SearchBar as the bundle name and click Submit
Implement the component as follows:
<aura:component>

    <input type="text" class="form-control" onkeyup="{!c.searchKeyChange}"
            placeholder="Search"/>

</aura:component>
Click File > Save to save the file
Click CONTROLLER (upper right corner in the code editor)
Implement the Controller as follows:
({
    searchKeyChange: function(component, event, helper) {
        var myEvent = $A.get("e.yournamespace:SearchKeyChange");
        myEvent.setParams({"searchKey": event.target.value});
        myEvent.fire();
    }
})
Make sure you prefix SearchKeyChange with your own namespace you created in module 2.
Click File > Save to save the file
In the Developer Console, go back to the ContactList component
Add an event handler for the SearchKeyChange event (right after the init handler):
<aura:handler event="yournamespace:SearchKeyChange" action="{!c.searchKeyChange}"/>
Make sure you prefix SearchKeyChange with your own namespace you created in module 2.
Click CONTROLLER (upper right corner in the code editor)
Add the searchKeyChange() function implemented as follows:
searchKeyChange: function(component, event) {
    var searchKey = event.getParam("searchKey");
    var action = component.get("c.findByName");
    action.setParams({
      "searchKey": searchKey
    });
    action.setCallback(this, function(a) {
        component.set("v.contacts", a.getReturnValue());
    });
    $A.enqueueAction(action);
}
Make sure you separate the doInit() and the searchKeyChange() functions with a comma
Click File > Save to save the file
In the developer console, go back to the QuickContacts application
Modify the div container as follows to add the SearchBar component to the user interface
<div class="container">
    <div class="row">
        <div class="col-sm-12">
            <yournamespace:SearchBar/>
            <yournamespace:ContactList/>
        </div>
    </div>
</div>
Make sure you prefix SearchBar and ContactList with your own namespace you created in module 2.
Click File > Save to save the file
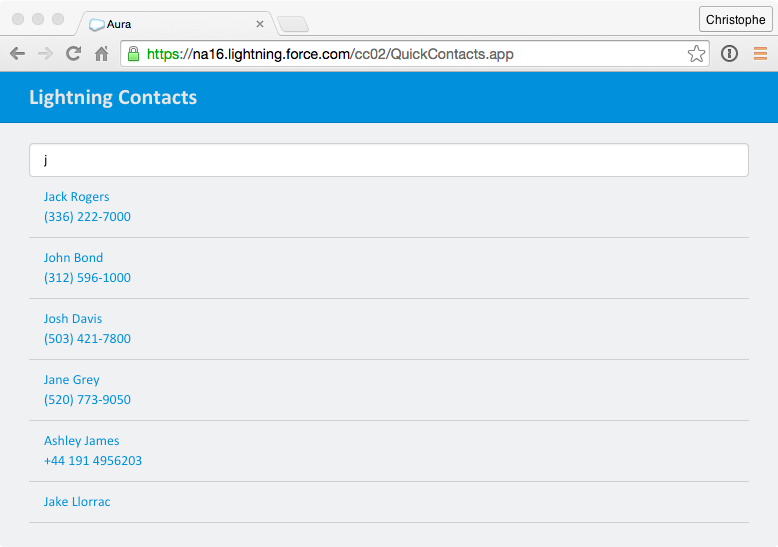
Click Update Preview to preview the application in the browser